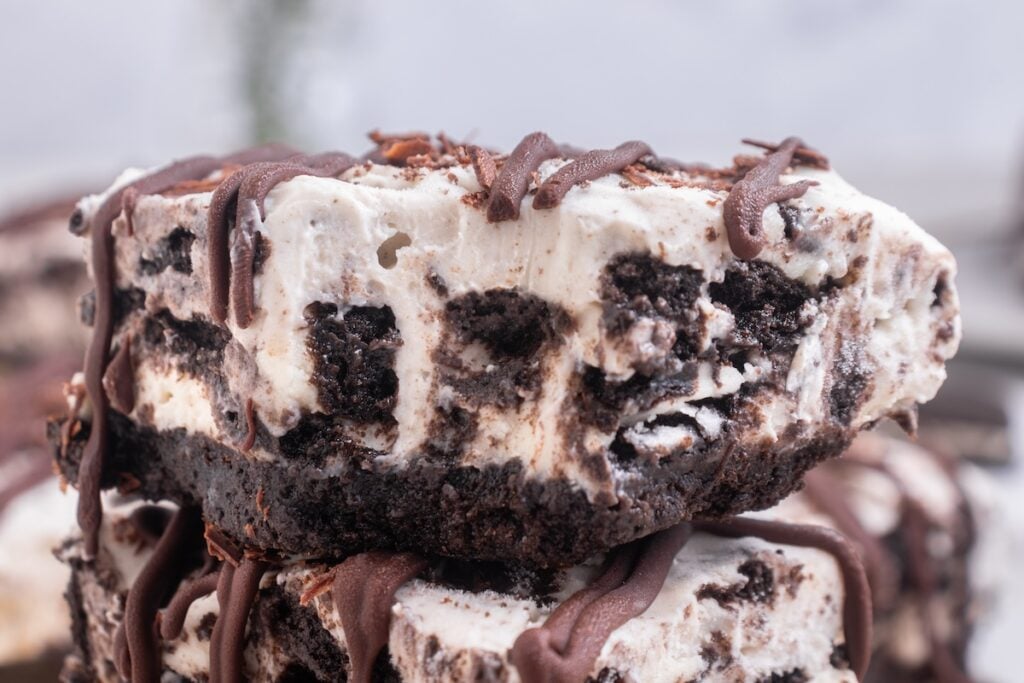
No Bake Chocolate Icebox Cake
One of our family’s favorite desserts to make is an icebox dessert that takes like cookies and cream ice cream. This no-bake chocolate icebox cake was always my mom’s go-to until Nabisco stopped making the chocolate wafers that were a staple for this recipe. Now we’ve found an excellent replacement that’s still no bake, still chocolate-y and is still a cake that firms up in the refrigerator or freezer.
No Bake Chocolate Icebox Cake Recipe
This page may contain affiliate links, which means I may be compensated if you click a link. However, there is no cost to you. Also, as an Amazon Associate, I earn from qualifying purchases. For more info, please see my Privacy and Disclosure page.
As I mentioned, this dessert was handed down through generations on my Yankee New England side of my family. And it was so simple — chocolate wafers and homemade whipped cream.
In fact, one of my cousins served it so much to her family that her son, even as an adult, requested chocolate icebox cake for his birthday. Not a store-bought dessert cake but the cake his great grandmother first introduced to our family.
Unfortunately, these days you can no longer find the chocolate wafers from Nabisco. I mean, even if you search on Amazon for Nabisco Famous Chocolate Wafers, it seems like you might find them. But most of the results are for anything Oreo. No surprise since Nabisco also owns the Oreo brand.
You can even find Oreo cookies without the filling, which would be a stand-in for those long-gone wafers. I’m tempted to try them in the future but they are pricey. However, most people — myself included — have discovered that using regular Oreo cookies or Oreo Thins can give you the same taste and flavor as a traditional icebox dessert.
What’s interesting about this recipe, however, is it combines the notion of an icebox dessert with cheesecake. At first I wasn’t sure about that combo but with one bite, I knew I had a way to get the flavor of a no-bake icebox chocolate cake once again even if those sought-after chocolate wafers were no longer available.

Ingredients Overview

Step-by-Step Instructions
Line a 9×9 square pan with parchment paper.

Mix crushed Oreos with melted butter in a bowl.

Transfer the base mixture to the prepared pan. You’ll want to press firmly on the parchment paper to ensure you have an even and compact base. However, this is dessert. It’s more about taste than presentation so do the best you can. Refrigerate the pan.

To prepare the filling, beat softened cream cheese with the vanilla extract, whipping cream and sugar.

Once the ingredients are well combined, add chopped or crumbled Oreo cookies. Stir to mix.

Pour the cheesecake filling over the prepared base.

Refrigerate for four to six hours or until firm. You can also pop it into the freezer if you need it to solidify faster. However, if you’ve got the time, refrigerating it overnight is best. This will give it time to set completely.

Once done, add any toppings you’d like. My grandmother and my mother always added extra chocolate wafer crumbles to the top. Another option is drizzling melted chocolate over the top. It will harden nicely because of how cold the cake is out of the icebox, er, refrigerator.

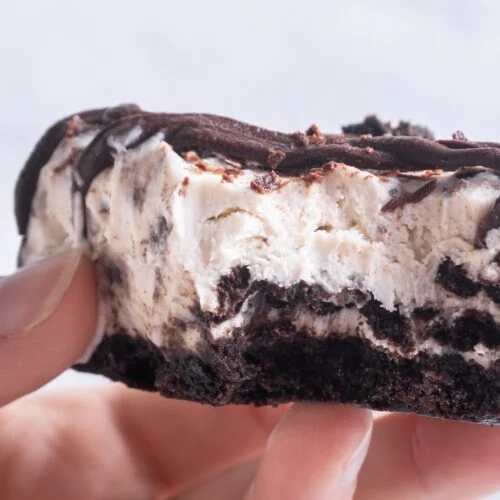
You can cut the icebox cake into squares to serve. In our family, though, we’ll usually just grab and spoon and dig in. This recipe is designed to feed nine people. To be honest, with four of us at the table, it rarely lasts if we go back for seconds.

Notes
You can store this icebox cake in the refrigerator for up to four days, as long as you transfer it to an airtight storage container. However, if you don’t think you’ll eat it that fast — how does it even last that long in your house? Like I said we gobble it up in one to two sittings — you can always move it to the freezer where it will stay fresh for about six months.
No Bake Desserts
We love no-bake desserts because, well, we don’t have to turn on the oven. Here are a few you’ll find on this blog.
No Bake Chocolate Icebox Cake
Equipment
Ingredients
- 8 ounces Oreo cookies crushed
- 1/4 cup butter melted
- 16 ounces cream cheese softened
- 1/3 cup sugar
- 1 teaspoon vanilla extract
- 1 cup whipping cream or heavy cream for whipping
- 16 Oreo cookies chopped
Instructions
- Line a 9×9 square pan with parchment paper.
- Take 8 ounces of Oreos and crush them.
- Mix crushed Oreos with melted butter in a bowl.
- Transfer the base mixture to the prepared pan. You'll want to press firmly on the parchment paper to ensure you have an even and compact base. However, this is dessert. It's more about taste than presentation so do the best you can.
- Refrigerate the pan while you move on to making the filling.
- To prepare the filling, beat softened cream cheese with the vanilla extract, whipping cream and sugar.
- Chop the 16 Oreo cookies.
- Once the ingredients are well combined, add chopped Oreo cookies. Stir to mix.
- Remove the pan from the refrigerator and pour the cheesecake filling over the prepared base.
- Refrigerate for four to six hours or until firm.
Notes
Nutrition
Disclaimer
Please note that nutrient values, if included with the recipe, are estimates only. Variations can occur due to product availability/substitution and manner of food preparation. Nutrition may vary based on methods of origin, preparation, freshness of ingredients, and other factors.